For many RVers, the adventure season comes to an end just as colder temperatures move in. While winter RVing can be a unique experience, the additional requirements and RV modifications it requires may only be practical for some. If you live in an area prone to freezing temperatures, it’s essential to properly winterize your RV for the cold months. Failing to do so could lead to costly repairs like busted pipes.
Need help winterizing your RV? Follow this guide to learn the basics of storing your RV during winter.
Why Do I Need to Winterize My RV?
Any water left in your RV’s plumbing system can freeze if the proper precautions aren’t taken during the winter. When this happens, the frozen water can expand and severely damage your RV’s pipes, water tanks, and fittings. Therefore, if you live in an area where temperatures can fall below 32 degrees Fahrenheit, it’s best to winterize your RV annually.
As a general rule, plan to winterize your RV well before temperatures drop into the low 40s/high 30s. That way, you have plenty of time to make the proper adjustments.
If below-freezing temperatures are rare or unlikely where your live, fully winterizing your RV may not be necessary. However, it’s still important to take the time to properly inspect and perform routine maintenance on your rig when preparing to put it in storage for an extended period.
How to Winterize Your RV
Step 1: Drain RV Water Supply
As mentioned, the most crucial step to winterizing your RV is removing any water that could freeze and damage your RV’s plumbing systems.
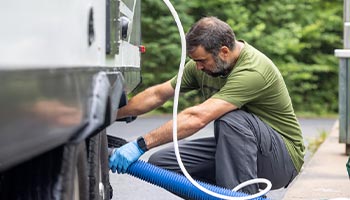
We’ll begin by draining all liquids from your RV’s water heater and holding tanks, including the freshwater, greywater, and blackwater tanks. Your freshwater tank can be emptied, but you’ll need to flush and clean your grey and black water tanks to prevent bacteria or mold growth.
Some RVs come equipped with a built-in flushing system, making the job easy. If your RV doesn’t have a built-in flushing system, you’ll need to use either a flush wand or an RV reverse flush valve.
Before moving to the next step, you’ll still need to empty the remaining water throughout your RV appliances, such as your sinks, showers, toilets, and more. To drain the remaining water, go around your RV, open all faucets and flush your toilets multiple times until dry.
Step 2: Add Antifreeze to Your RV
Adding antifreeze is highly recommended if your RV will be stored in harsh winter conditions. However, before adding antifreeze to your RV, you’ll want to ensure that you bypass the water heater. Failure to do so will result in your water heater filling up with antifreeze. Some RVs come with a bypass feature installed. You’ll need to install a bypass kit if your RV doesn’t.
To add antifreeze:
- Disconnect your RV’s water line and put one end of the tube into the antifreeze container.
- Activate your freshwater pump to allow the antifreeze to travel throughout your RV.
- Once pressure has built, turn on your RV’s faucets and flush your toilets until antifreeze appears.
- After this, turn off the water pump and reconnect your water line to the freshwater tank.
Step 3: Clean RV Interior
Once your RV is protected against freezing damage, clean and remove excess cargo from your RV’s interior. Since your RV will be out of use for an extended time, remove all food and temperature-sensitive materials from your rig. You can also use this time to give your RV a deep clean, so it’ll be ready for the next season.
Step 4: Remove and Store RV Batteries
To properly winterize your RV, you’ll also need to remove and store your RV’s batteries. RV batteries can be damaged during harsh winter conditions, so removing and keeping them in an area away from the cold is recommended. However, suppose you live in an area that does not freeze. In that case, you can disconnect the battery cables when preparing to store your RV for an extended period.
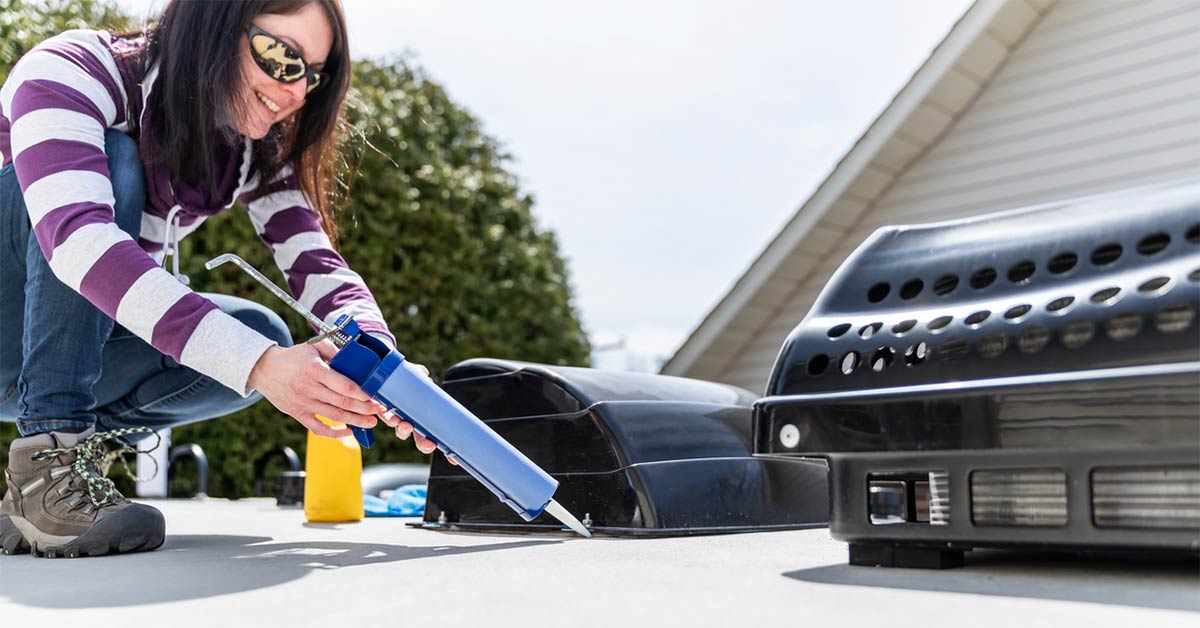
Step 5: Protect Your RV’s Exterior
The next step to winterizing your RV is to ensure uninvited guests (critters, pests, debris) don’t find a way into your RV. Begin by reinforcing your RV’s vents. If exposed, these can be prime entry points for bugs, snow, and humid air. Adding vent covers to each opening and double wrapping in plastic can add extra water protection.
In addition, inspect your RV for cracks or openings alongside your windows and door frames. If any are found, use caulking to fill the seal.
Step 6: Place RV on Leveling Blocks
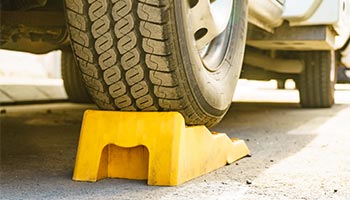
If your RV is left parked for an extended period, its tires may develop “flat” spots due to the heavy weight of the RV. This can lead to tire damage and blowouts once you begin using your RV again in the springtime. To prevent any issues, we recommend using RV blocks to distribute the weight of your RV evenly.
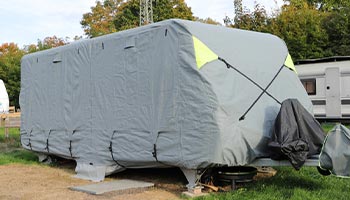
Step 7: Add RV Skirting
Now that you’ve drained your tanks, sealed any openings, and leveled your RV, your final step should be to add RV skirting to further protect your RV’s underside. RV skirting is designed to insulate the bottom of your RV by preventing cold air from traveling underneath your rig.
While not always required, installing RV skirting will provide your pipes with an extra level of protection against frost damage. RV skirts can come in a wide range of materials, such as foam boards or puncture-resistant vinyl.
Save on RV Insurance During the Off Season
Carrying RV insurance throughout the year is essential to protect your rig while you’re off adventuring. However, did you know it’s possible to save money on RV insurance during winter by switching to a storage-based policy? Depending on your policy, this option could help you save significantly. If you want to learn more about how AIS can help you save on RV insurance, call one of our insurance specialists today at (888) 772-4247.
The information in this article is obtained from various sources and is offered for educational purposes. Furthermore, it should not replace manuals or instructions provided by the manufacturer or the advice of a qualified professional. No warranty or appropriateness for a specific purpose is expressed or implied.